Building effective drip campaigns is crucial for Senior Living Marketing Agencies leveraging ActiveDEMAND to nurture leads and guide prospects through the customer journey. This guide explores key strategies and best practices when it comes to designing and building your drip campaigns in ActiveDEMAND.
Key Points:
- Entry Conditions: Identify all scenarios for contacts to enter the campaign.
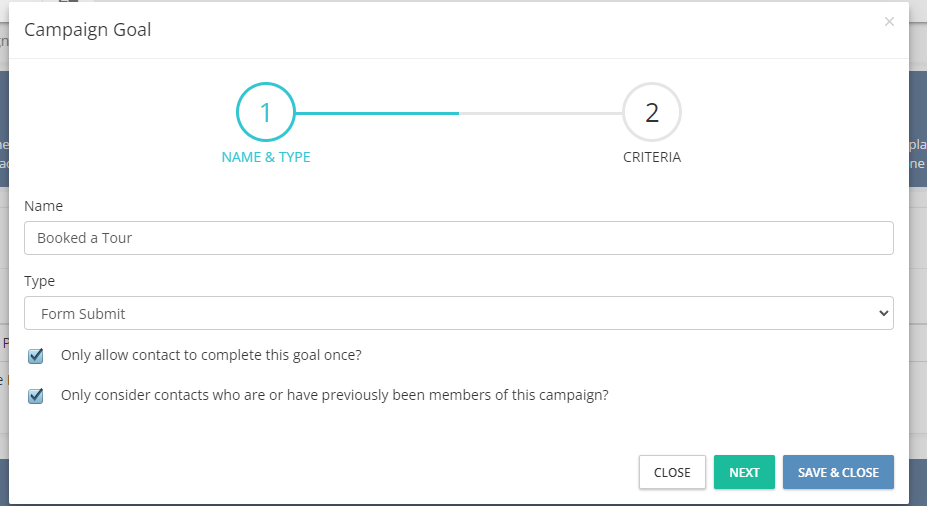
- Goals: Establish specific goals for campaigns. Ask yourself, what do I want prospects to do in this campaign?
- Other Exit Conditions: Recognize alternative exit conditions for contacts not aligned with campaign goals – if they exist.
- Suppression Lists: Implement suppression lists to exclude contacts who should not be included in the campaign.
- Campaign Assets: Add any specific assets to the campaign such as landing pages, popups, call tracking numbers, etc.
- Email Templates: Utilize email templates and “Link” them to email actions within the workflow.
- Use the Autoresponder: Leverage the autoresponder workflow, particularly for campaigns triggered by webforms, to promptly deliver initial emails and set any fields you may need to set.
- Tips: Try to follow these tips to make sure you are getting the most out of your campaigns and not making things unnecessarily harder on yourself.
Entry Conditions (Triggers)
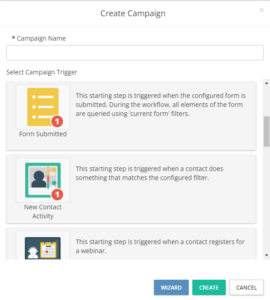
Identifying all entry conditions (sometimes referred to as triggers) is paramount when designing and building a workflow in ActiveDEMAND. By defining the various scenarios through which contacts enter the campaign, such as a CRM field value, a form fill, or some other action by a contact, agencies can ensure that we only begin communicating with the intended contacts.
You can take a look at the starting steps available for drip campaigns this ActiveDEMAND document. I recommend you keep them specific, but straight forward too. If you have 10 different entry conditions then it might be worth rethinking who you are targeting and the purpose of your campaign.
Understanding the entry conditions allows agencies to tailor their communication strategies and content based on the specific actions or behaviors of their prospects. Ultimately, by accurately identifying entry conditions, agencies can create targeted and personalized drip campaigns that effectively nurture leads and guide them towards conversion.
Your campaign should be highly targeted for a specific type of contact and you should be trying to get them to take some further specific action to convert – in other words, a goal.
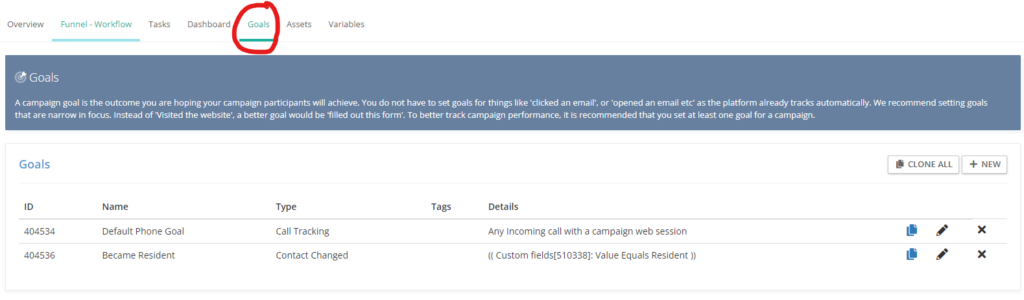
Goals (Exit Conditions)
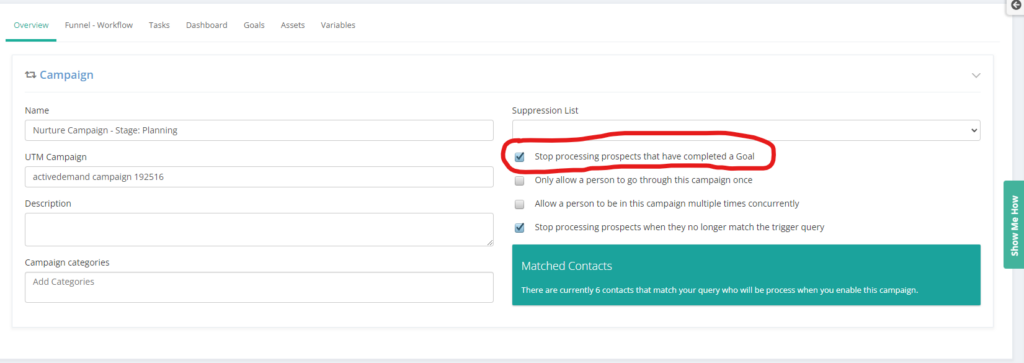
Setting specific goals within ActiveDEMAND drip campaigns is essential for guiding prospects through the customer journey and ultimately driving conversions. These goals serve as actionable milestones that signify the completion of significant steps in the customer journey, such as filling out a form, placing a phone call, or reaching a specific status in the CRM – and we usually want to report on these.
Typically by identifying a specific goal, we want to remove them from this specific campaign and push them to the next part of the journey – thus it’s common for a goal to also be considered an exit condition.
By defining clear objectives for drip campaigns, senior living agencies can track the progress of their leads and measure the effectiveness of their marketing efforts.
Other Exit Conditions
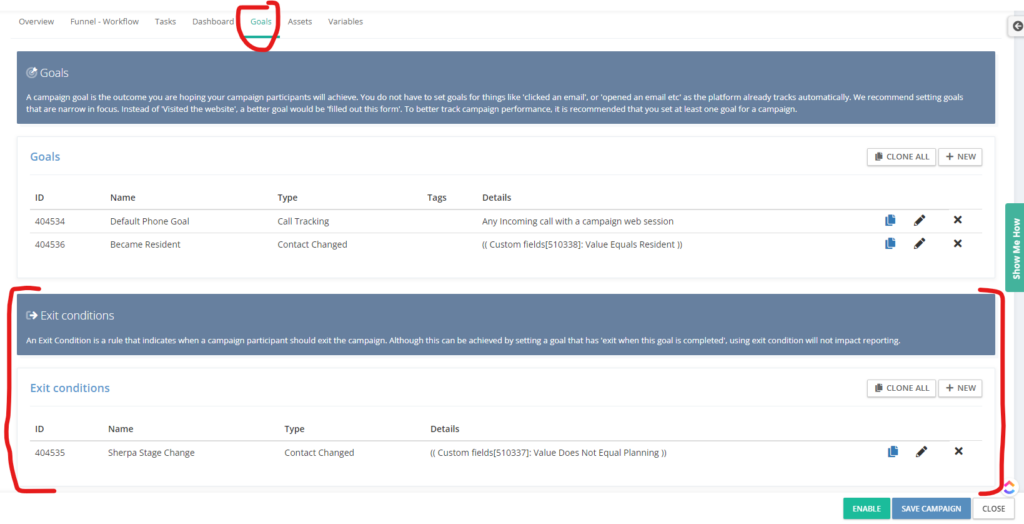
Exit conditions are similar to goals with the key difference being that we won’t see these appear in reports. They are just scenarios where a contact should be dropped from the campaign. For example a contact fills out some other form and starts some other journey or campaign. We may not want to count that as a goal, but we may want to stop sending them emails from this campaign and let the other take over.
Exit conditions can also be defined on the goals tab, below your goals. Previously you would have done this with strategically placed “Decisions” in your workflow but this relatively new feature makes things more convenient.
Suppression Lists
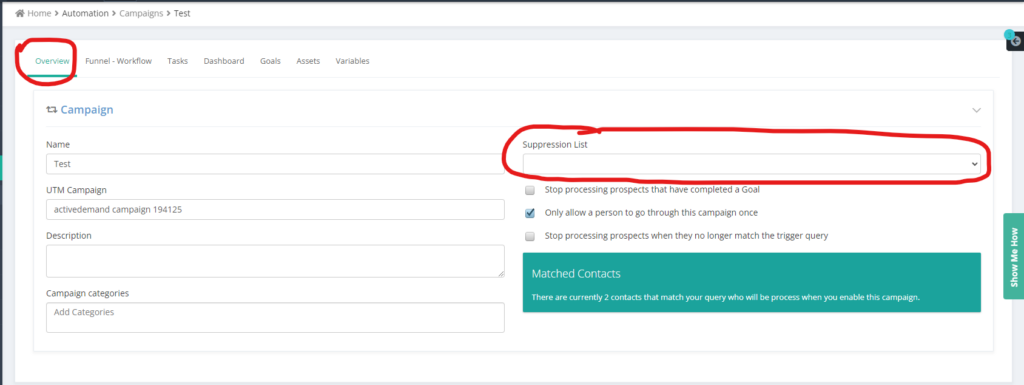
Suppression lists play a crucial role in ensuring that only relevant contacts enter ActiveDEMAND drip campaigns. These lists help you to avoid sending communications to individuals who should not receive them under any circumstances, such as existing customers, or leads marked as uninterested.
By carefully managing suppression lists, agencies can maintain the integrity of their marketing efforts, minimize the risk of sending irrelevant or unwanted messages, and enhance the overall effectiveness of their campaigns. Additionally, utilizing suppression lists helps agencies comply with regulatory requirements and maintain positive relationships with their audience by respecting their preferences and privacy.
When building a drip campaign, take a moment to ask yourself if you should have a suppression list.
Campaign Assets
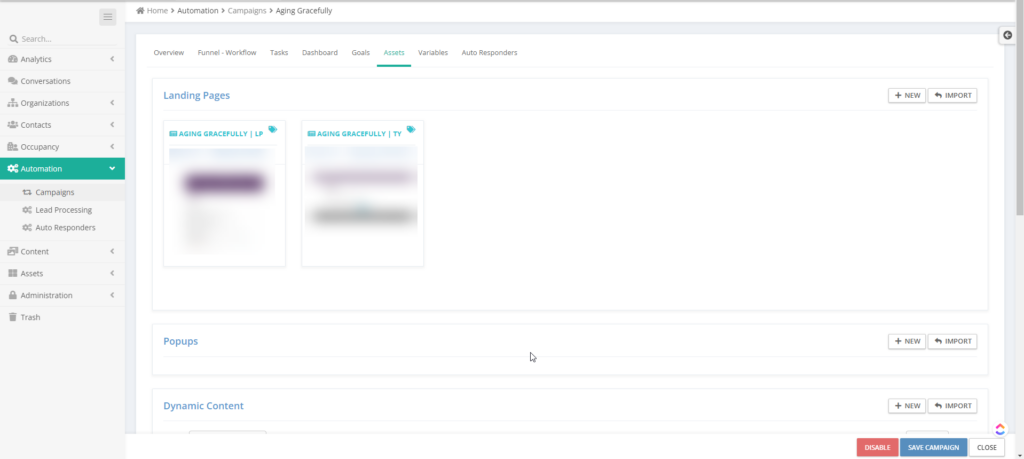
Adding assets to a campaign in ActiveDEMAND is an excellent practice for maintaining organization and optimizing tracking.
By including assets such as landing pages, call tracking numbers, trackable links, popups, dynamic content, and content cards, senior living agencies can effectively manage their marketing materials and ensure consistency across their campaigns. Moreover, having all assets housed within the campaign streamlines the tracking process, allowing agencies to monitor performance metrics and analyze data more efficiently.
This centralized approach not only simplifies campaign management but also facilitates accurate reporting and enables agencies to make data-driven decisions to enhance their marketing strategies.
Linking Email Templates
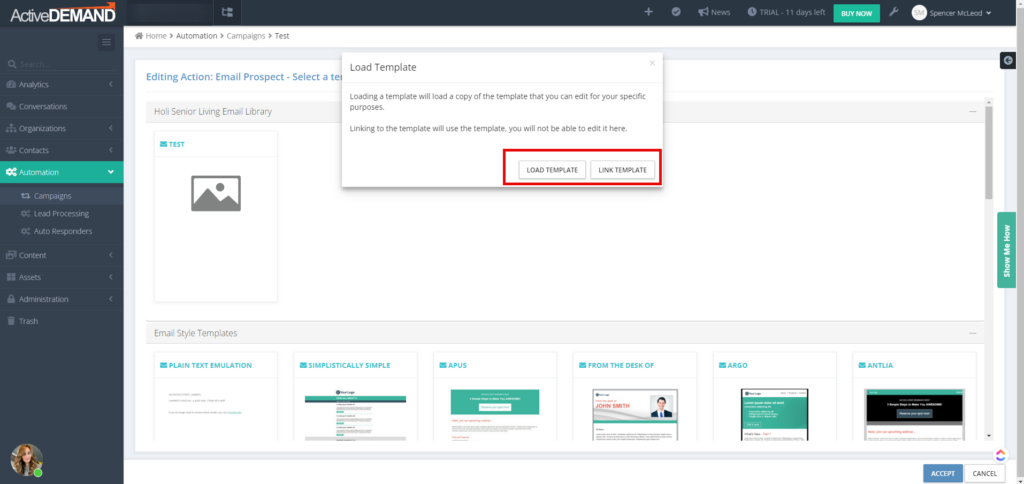
First, let’s be clear on what we’re talking about here. There are two options when you select an email template for a campaign. You can “Link” the template, or “Load” the template as shown above.
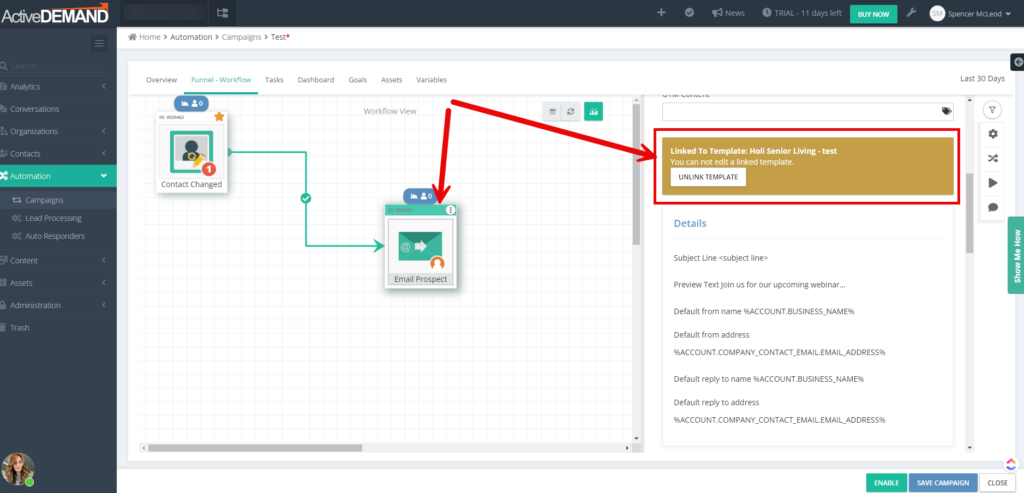
This may come down to a personal preference, however I choose to build my emails as templates and then “Link” them in my workflow. Here’s why:
- If I edit that template, my edits are reflected in my other campaigns that have “linked” the email. In other words, I can edit my email once and the changes are immediately reflected across the platform in any other campaign that links to the email.
- Redundancy. If I load a template, that content and that email only lives in the campaign you have loaded it into. Accidentally removing that email from your campaign might force you to rebuild your email. Linking a template can help prevent an “oops”.
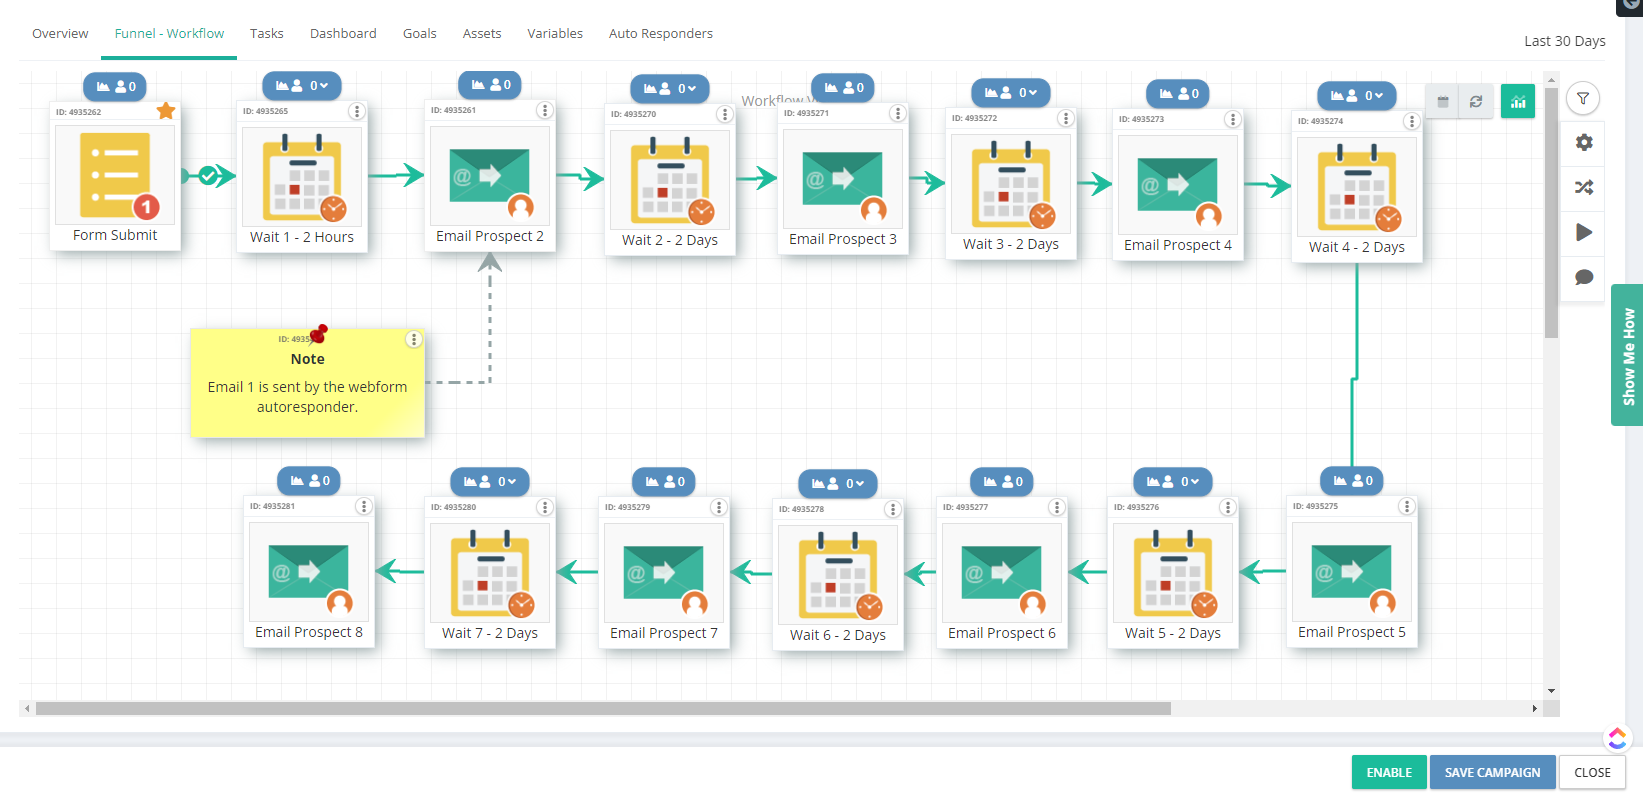
Using the Webform Autoresponder
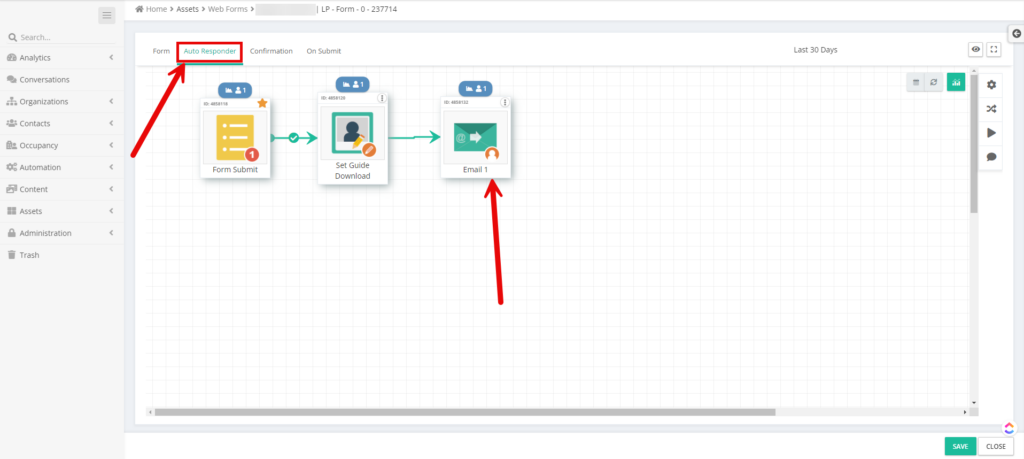
In senior living, it is common to offer guide downloads to prospects, and nurture them with a series of emails to try to get them to convert. Typically this is done by having the contact fill out a form and then delivering the guide in the first email.
This is an excellent scenario for using the autoresponder workflow to deliver your first email, and then passing the contact over to the drip campaign for further nurturing.
First let’s discuss why we would do this, and then we will cover how it’s done.
Why:
- In this scenario there is virtually no situation where you don’t want this guide to be delivered. Even if the contact is already a customer. Or maybe they lost the original email in their inbox. You always want this guide to be delivered regardless of who is filling it out.
- If you send the first email from the campaign, and the contact is on your suppression list or meets an exit condition, they won’t receive that first email. So they will not get your guide.
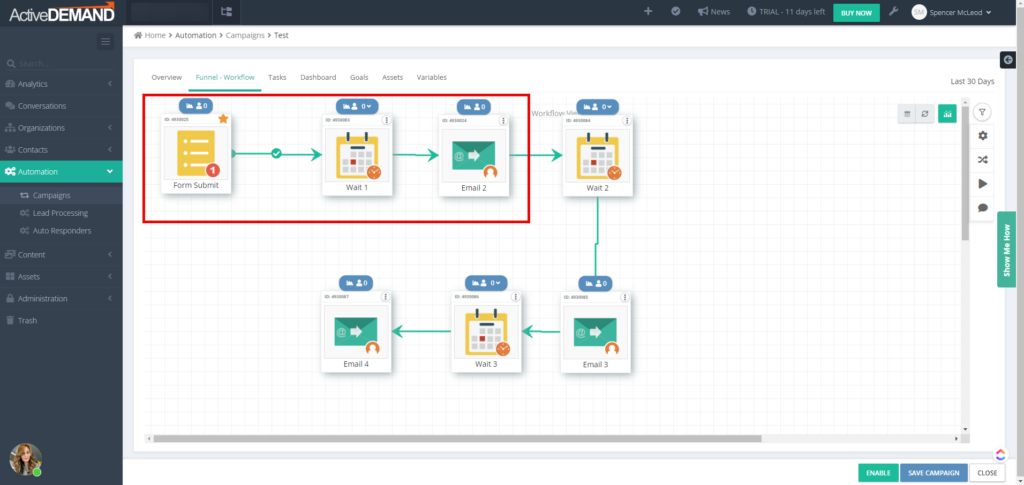
- We will trigger the campaign with the “Form Submit” trigger and select our desired form as the triggering form.
- The first step in the campaign will likely be a “Wait”. Why? Because we know that when a contact enters this campaign they have already been sent the first email by the the webform’s autoresponder. My second email probably shouldn’t be sent for at least a few days. Hence why we select a “Wait” as our first step in the drip campaign following the “Form Submit” trigger.
Tips & Tricks
Here’s some additional helpful tips and tricks to help you get the most out of your campaigns.
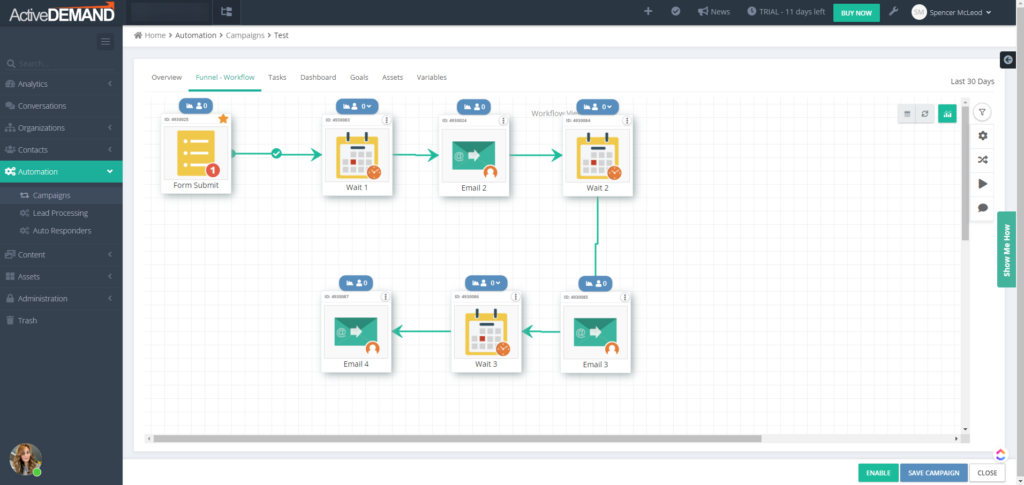
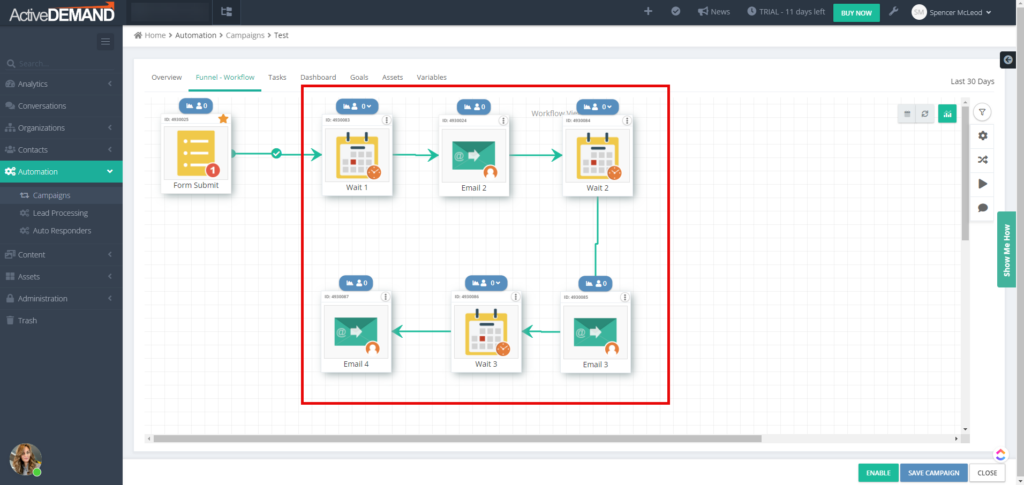
1. Give Every Action a Unique Name
Give every action in your workflow a unique name. This will help you when you look at reports or when you are troubleshooting. You can be as general or specific as you like, the key is to make everything unique. As you can see below, we kept it simple with “Wait 1”, “Email 2”, “Wait 3”, and so on…
2. Use ActiveDEMAND Webforms
If you are not using ActiveDEMAND forms you are really making this hard on yourself. Webforms are such a common conversion method and we want our automation/campaigns to be able to see this activity. It’s either a trigger or an exit condition – or both – when used in a campaign.
You can’t possibly expect your marketing automation platform to do everything you want it to do if you aren’t using it as designed. The last thing we want is to end up trying to “hack” our way around things and then wonder why something isn’t working. This can get expensive too when you’re being charged by the hour by an implementation team.
3. Be Specific
This is more for the people involved in the strategy side of things. If you are designing a campaign and handing it off to an implementation team, this is for you.
Your triggers, exit conditions, goals, and workflow decisions (which we didn’t cover in this) should be very specific – and you need to know where to find these values or actions so we can use them. Your implementation team will thank you whether it’s us at Digified Media, or someone else.
For example it’s not uncommon for us to receive an instruction from an agency to “remove the prospect if their status is [insert some status]”.
The problem with this is that it’s not always clear to us what the actual field is that holds that value. We don’t always know where to look for this.
Clearly identifying the name of the specific field we are wanting to look at can actually be a huge time saver.
Another scenario we see often is “remove the prospect if they booked a tour”. Okay, no problem. How do we know they booked a tour? Is there a form submission we are waiting for, and if so what form is it or what page can we find that form on? Or is it a status in the CRM perhaps?
Once again, it comes down to knowing where to look for this important condition we want to build a condition around.
Final Thoughts
We know this post might be a lot to digest for some, especially if you are new to ActiveDEMAND. However the senior living industry is seeing a lot of adoption in it’s use of ActiveDEMAND and we want to make sure you aren’t learning too many things “the hard way”.
Make sure to check out our Drip Campaign Design Aid. Our hope is that it will take many of the points in this article and turn it into an easy to use, self guided walk through for getting your drip campaign functioning to it’s full potential.